Sticky logo
 Search


The Slacker Sag Scale is pretty awesome. Gone are the days of needing a buddy/mechanic/suspension-tuner to help with setting sag. This used to be such a cumbersome process which included: suiting up, getting on the bike, measuring, getting off the bike, adjusting, then repeating the process until the desired setting is acheived. Having the correct sag is the first step to tuning suspension specifically for your weight.
A little background on how you set sag. When measuring sag, you typically measure static sag and rider/race sag. Static and rider/race sag are calculated by using two measurements. Optimum settings will vary depending on your bike and riding style.
Static Sag (no rider on bike):
- Measurement 1 is of the bike on a center stand with rear suspension fully extended - measure axle to number plate following the arc of the axle.
- Measurement 2 is of the bike off the center stand with both wheels on the ground.
- Push down on the seat to compress the rear end, release, then measure axle to number plate following the arc of the axle.
- Subtract the highest number from the lowest (measurement 1 - measurement 2) and you will get your static sag.
Rider/Race Sag:
- Done the same way for measurement 1, but for measurement 2 the rider is suited in their riding gear, helmet and all, sitting on the bike.
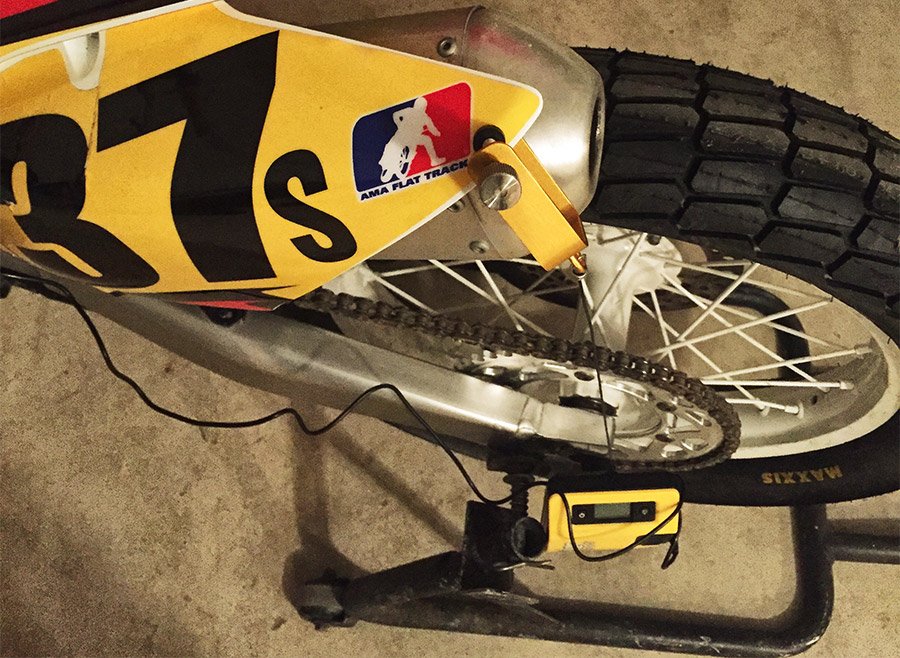
What Motool has managed to do is effectively put that same buddy/mechanic/suspension-tuner into a digital tool called the Slacker Digital Scale. This thing works like a charm and is so easy to use that one individual can do it in their garage in less than 20mins. The instructions were pretty straight forward. I’ll focus mainly on the rear for this demonstration. They provide a clamp, a digital scale, an auxiliary cable, and a digital reader.
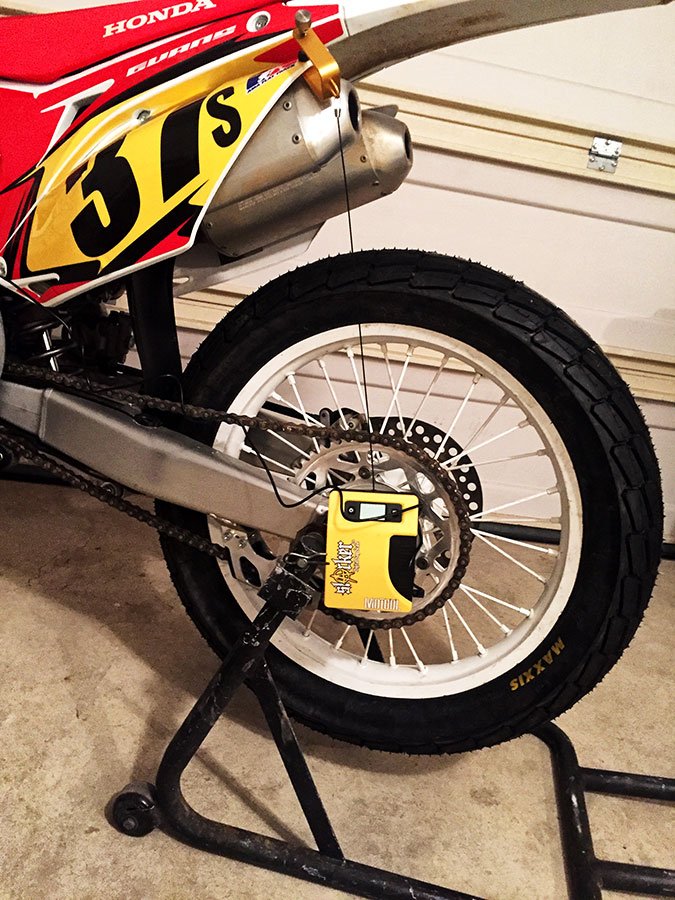
To get started, place the digital scale, which has a powerful magnet on the back, to the rear axle of the bike. From there, find the arc of the axle and place the clamp on the number plate. Attach the digital reader to the handlebar and connect the wire from the reader to the scale. Now set the scale to zero and follow the steps above to find your static sag and your rider/race sag. The number that’s printed on the digital reader will be your sag.
To adjust your sag simply tighten or loosen the rear shock spring to the desired height, measure again, then pat yourself on the back because you just accomplished setting up your rear suspension. Call your local dealer or research online to find the proper sag numbers for your particular model. www.motool.co
For reference, my numbers are as follows:
2015 CRF250R - Rear
Rider/race sag: 104mm
Static sag: 34mm
PROS |
CONS |
| ▲ Easy to read back lit digital display | ▼ The batteries that came with it were cheap and didn't last long |
| ▲ Lightweight and easily portable (Can easily fit into any toolbox, backpack, or gear bag) | |
| ▲ Easy mounting (Strong velcro strap for the handlebar display, adjustable clamp for the number plate, and powerful magnet for the rear axle on the Digital Scale) |
Where to Buy: