Sticky logo
 Search

Want kudos from your pals during your next camping moto-adventure? Learn to build a fire. This essential skill can be learned by any adventure rider. All it takes is the right process, good tools and a little practice. The result? During your next camp you’ll have the ability to create a glowing morale booster that provides warmth, entertainment, and a heat source for cooking, while you gain the distinctive title of “Firecrafter.” Here are some guidelines to get started.

Step 1—Preparation
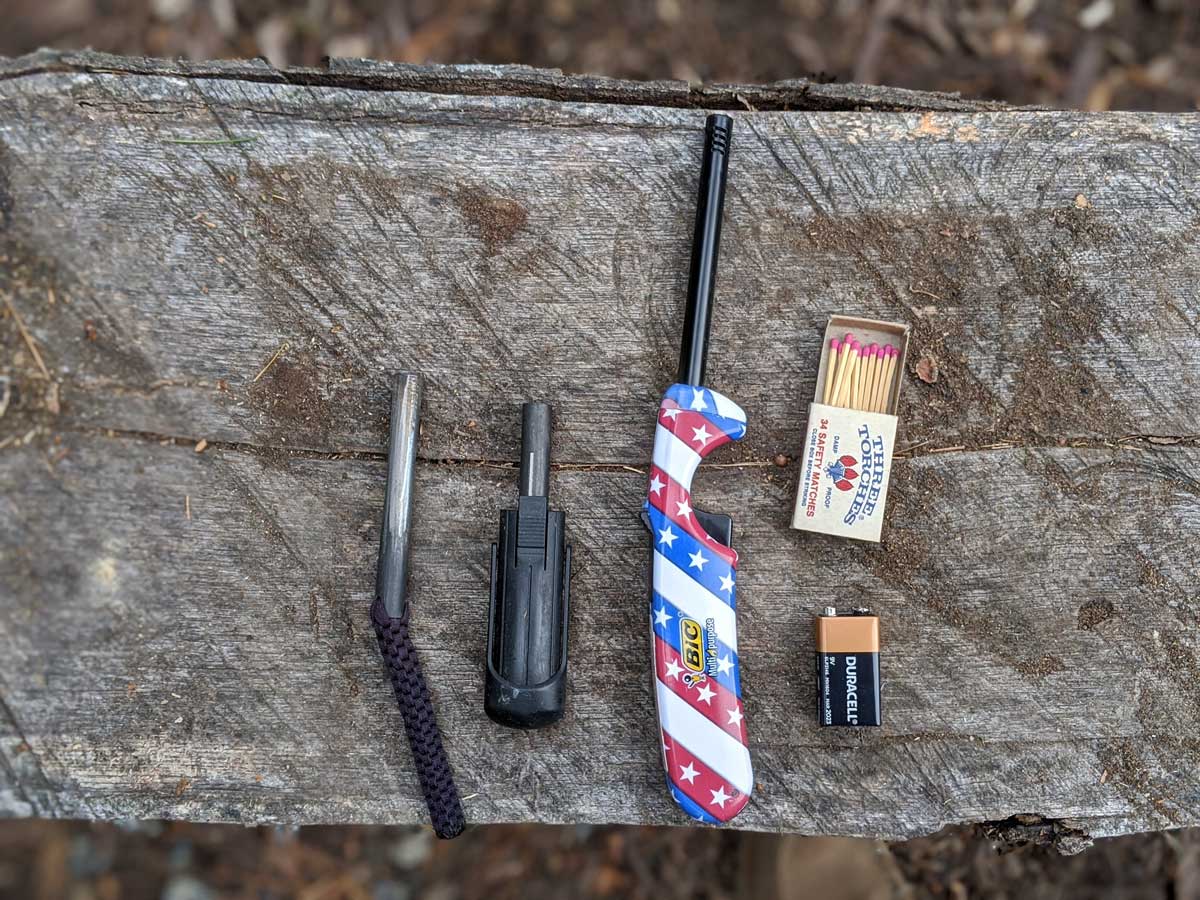
Bring the right tools: Seasoned campers and experienced adventure riders carry a small fire kit as part of their essential gear. This kit typically includes an axe, hatchet or saw; a pocketknife; waterproof matches, a lighter, or ferro/magnesium rod (aka metal match); and a small tinder kit. We prefer metal matches like the one shown in the photo because they’re superior ignition sources for most conditions, easy to transport, cost effective and last forever. Sparks from metal matches burn at 4,000°F and the magnesium flakes burn even when wet. Lighters are dependable but be careful to make sure you have plenty of fuel to last an entire trip. No one wants to eat cold food or sit around a small void of darkness after a long day’s ride.
Prepare the site: Use designated fire pits whenever available, but when building a fire on the ground prepare the site by clearing a four-foot circle all the way down to bare earth. This will be the fire bed, so make sure there are no plant materials around. You’ll also want to give your fire bed plenty of space by placing it at least 10 feet from anything flammable, including your tent, gear and ride. Remember, moisture is an enemy to fire. If the ground is damp, build your fire on top of dry wood or tree bark.
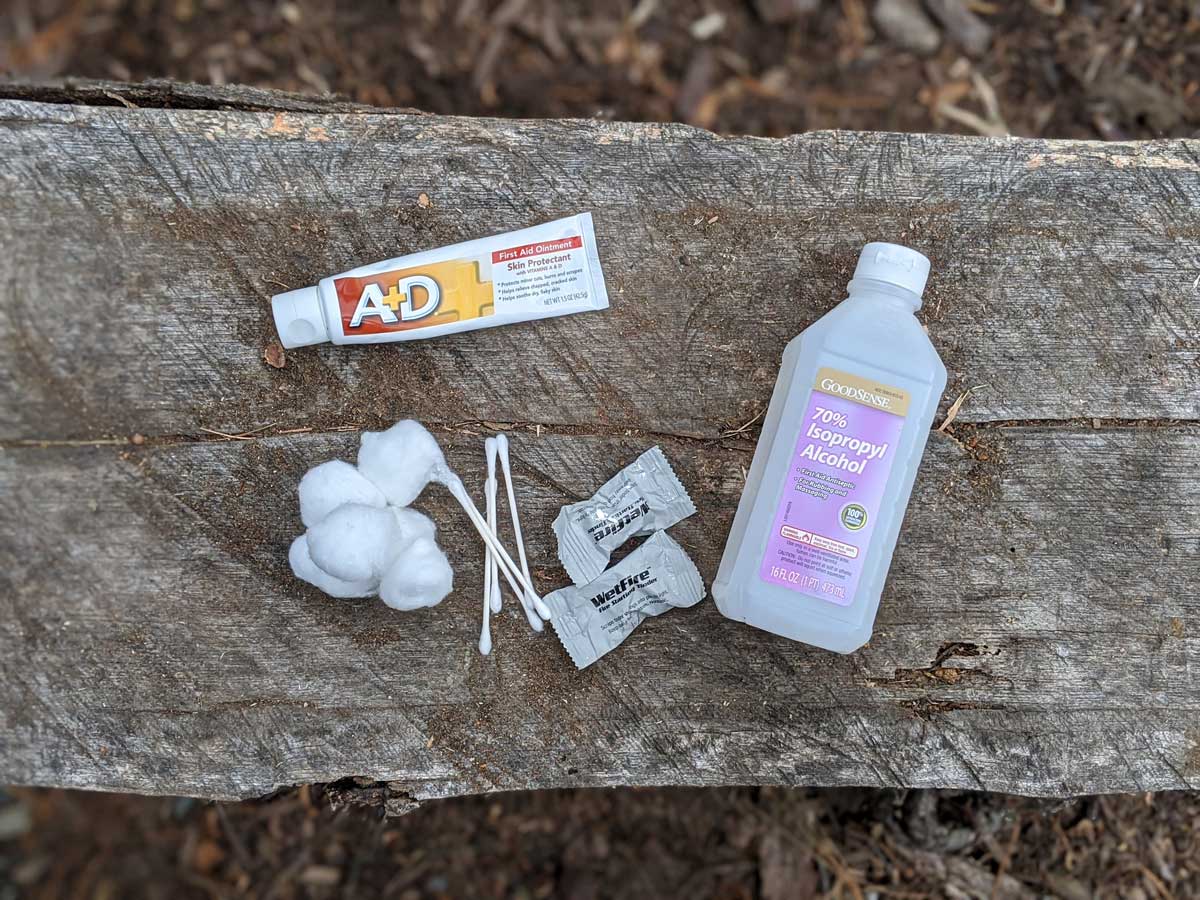
Prepare a combustible source: Combustible material is used to start fires and ignite kindling, then fuel. It’s best to bring reliable combustible material that you can depend on. You can purchase commercial products like hexamine cubes from most stores that sell camping equipment. You can also make your own by covering cotton balls or swabs with petroleum jelly or squirting small amounts of isopropyl alcohol onto kindling. Cotton balls covered with petroleum jelly are a well-known trick that overlanders have used for years. These can be stored in a Ziploc bag and you usually don’t have to worry about damaging them in transport. Petroleum jelly is used to slow the burn rate of the cotton, thereby making the flame last longer. This gives a better chance to ignite kindling.
If you’re in survivalist mode and in natural areas, consider using crumbled birch bark, dry grass, or even a bird’s nest as a combustible source. If you find moist tinder, use the heat of your motorcycle’s engine block, which can exceed temperatures of 230°F, to dry things out. Make sure you’re properly protected and be sure not to ignite the material in your hands. Also, in an emergency you can use your motorcycle fairings which are made of plastic with a petroleum base—use a pocket knife to create scrapings. If you’re chopping up your bike, make sure you collect a handful of the smallest pieces you can, about the size of a golf ball. Plastic fairings are polymer and considered a fuel, but be careful of off-gassing. Burning plastic generates toxic carbon monoxide fumes that are unpleasant to smell and cause irritation.
Collect kindling: Kindling is dried, combustible material, usually sticks thinner than the diameter of a pencil. Sources of kindling include dead lower branches or fine shavings from splitting logs. Fatwood also makes a great kindling source and can be purchased from hardware stores. Fatwood is derived from the heart of pine trees. The terpene in fatwood easily ignites and burns well. Ensure strips are longer than five inches. These strips will be stacked, so make sure there is some consistency to size, length and width.
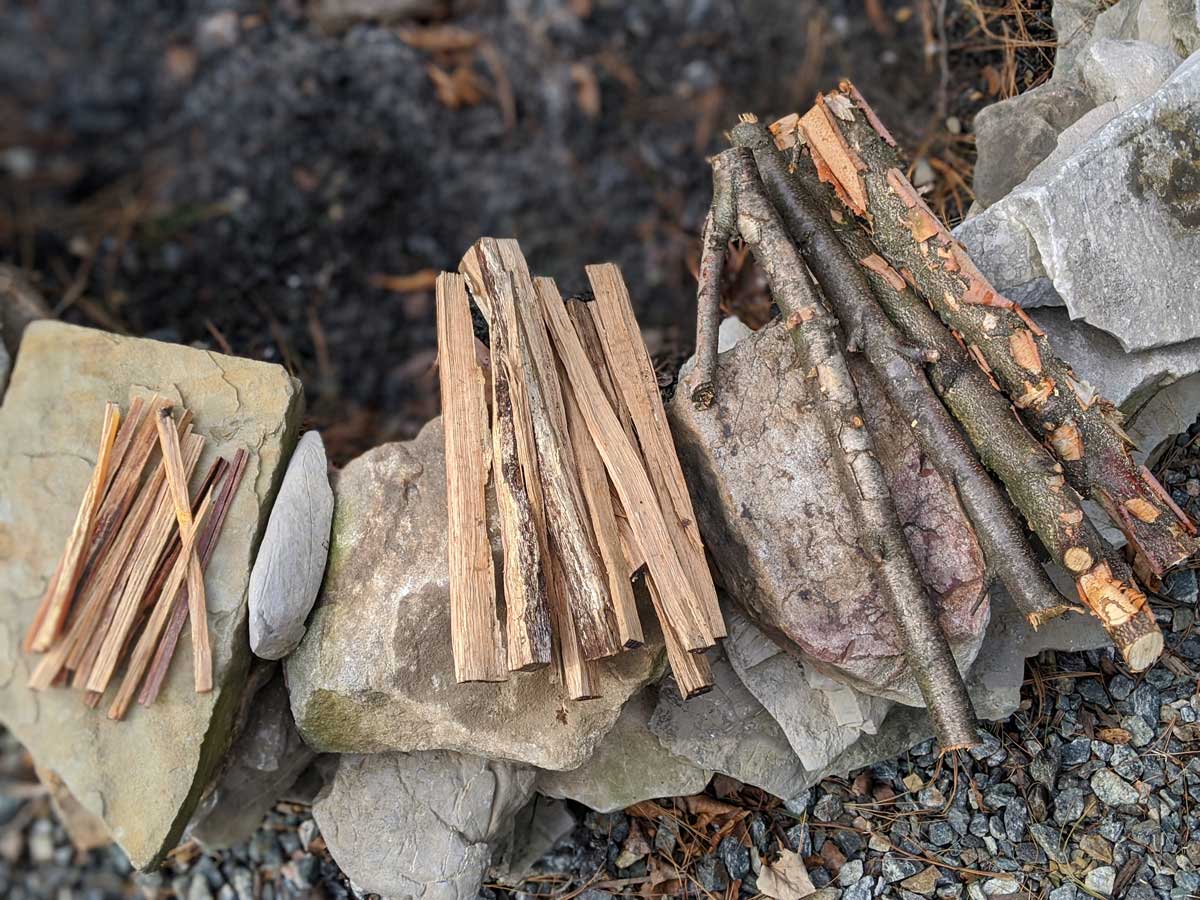
Collect your final fuel: Firewood is the most common fuel used. This fuel is usually greater than three inches in diameter, or split logs. Find a dry felled tree or purchase wood from the local park ranger or host. Most state and national parks require you to purchase kiln-dried, bug-free local wood. You can burn green (unseasoned) wood after you have a hot enough fire; however, it’s always best to burn seasoned wood. Check the rules and local laws about building fires before arriving at your campsite. Bringing your own wood in some cases is not only discouraged, it is illegal.
Step 2—Ignite your combustible material
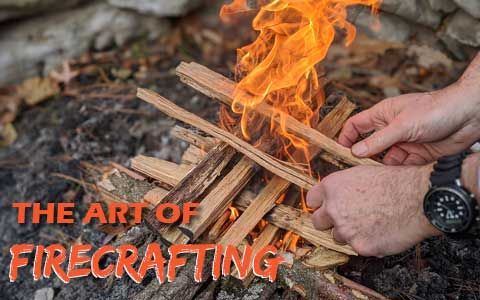
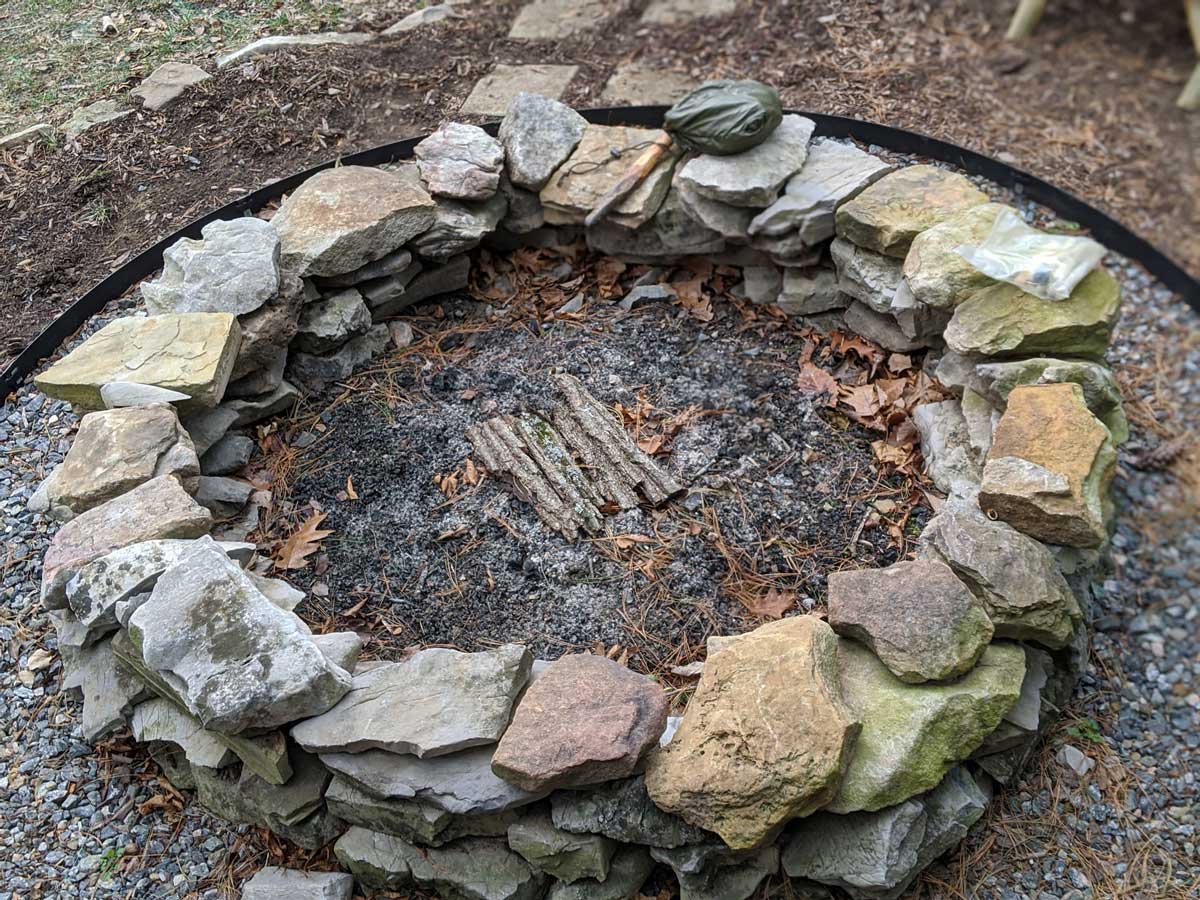
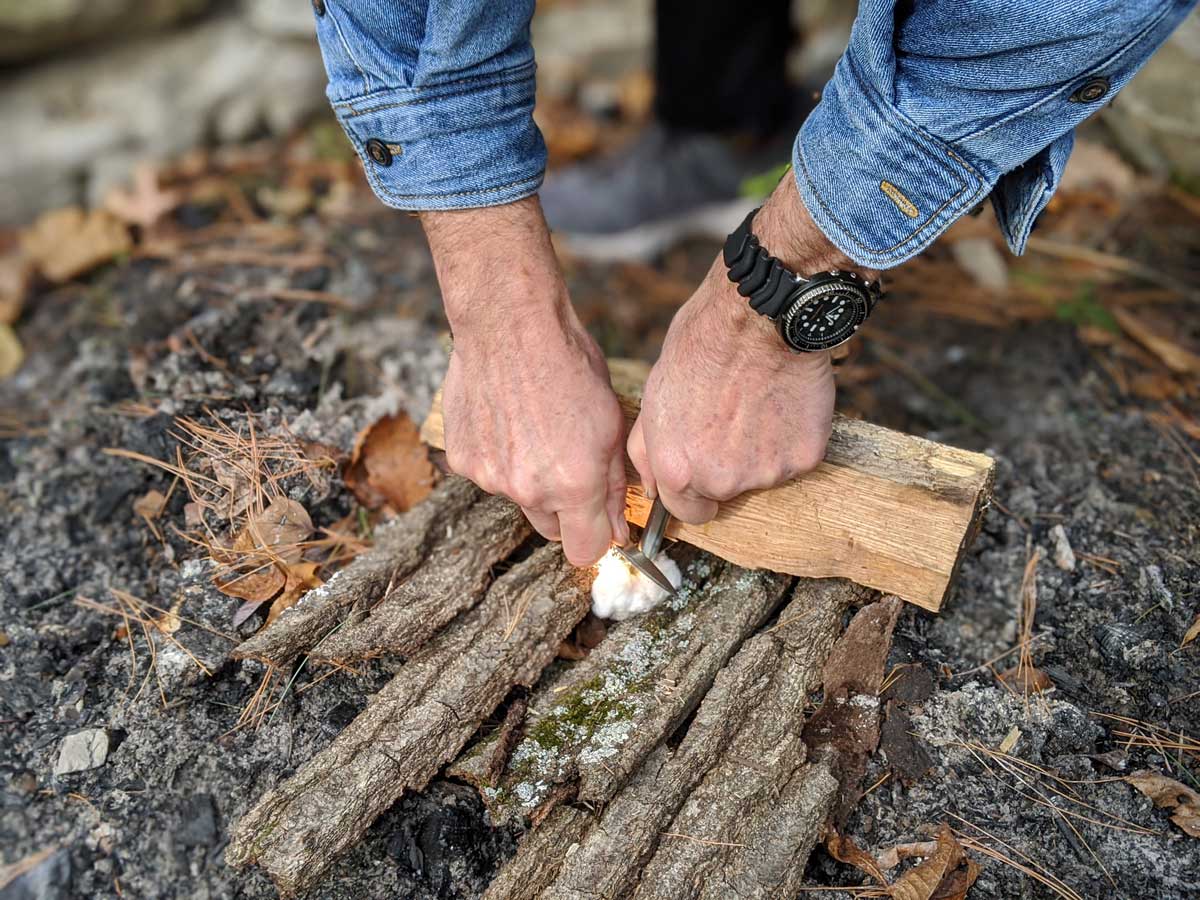
In the center of your fire bed, place combustible material (i.e. cotton balls covered in petroleum jelly) into a pile. Gently pull apart the balls to ensure the fibers have plenty of access to air. If using a metal match, place the end directly on top of the cotton balls and at a slight angle, as shown in the photo. Apply the edge of your pocketknife firmly to the metal match and stroke in a downward motion to create sparks.
If you’ve never used a metal match it may take a few times to create sparks; it’s a simple tool to master and good to keep handy.
Step 3—Add kindling and larger fuel
For the most effective fire, organize kindling and fuel in a “fire lay.” Fire lays are organized methods to stack wood around flames to ensure consistent burn rates. The lean-to method pictured in the photo is an expedient fire lay which allows oxygen to freely flow and ignite kindling. Oxygen is a key element because it supports combustion. As an oxidizer, it helps ignite material at lower temperatures while simultaneously increasing burn rates. Simply place a log next to the ignition source and begin leaning kindling over the flame as pictured.
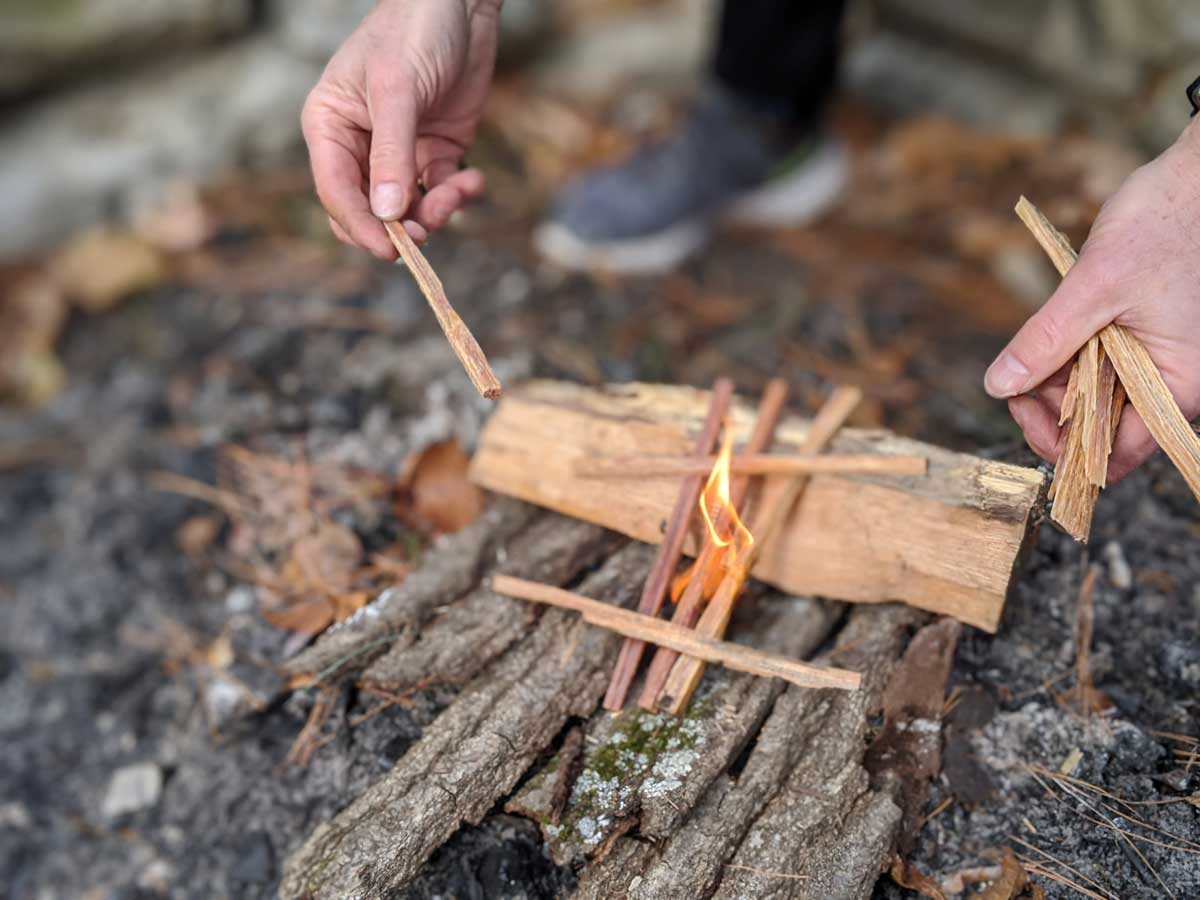
Once kindling is ignited and flames are about two inches high, add a similar size log parallel to the existing one. At this point, you’ll begin creating a “cabin fire lay.” Stack kindling by boxing around the fire, creating a cabin-like structure. Continue boxing and stacking kindling until flames are about knee-high. Once the flames are knee high, start adding fuel sources that increase in size. Begin adding larger fuels, like split wood, in a cabin lay until there is a strong, consistent burn.
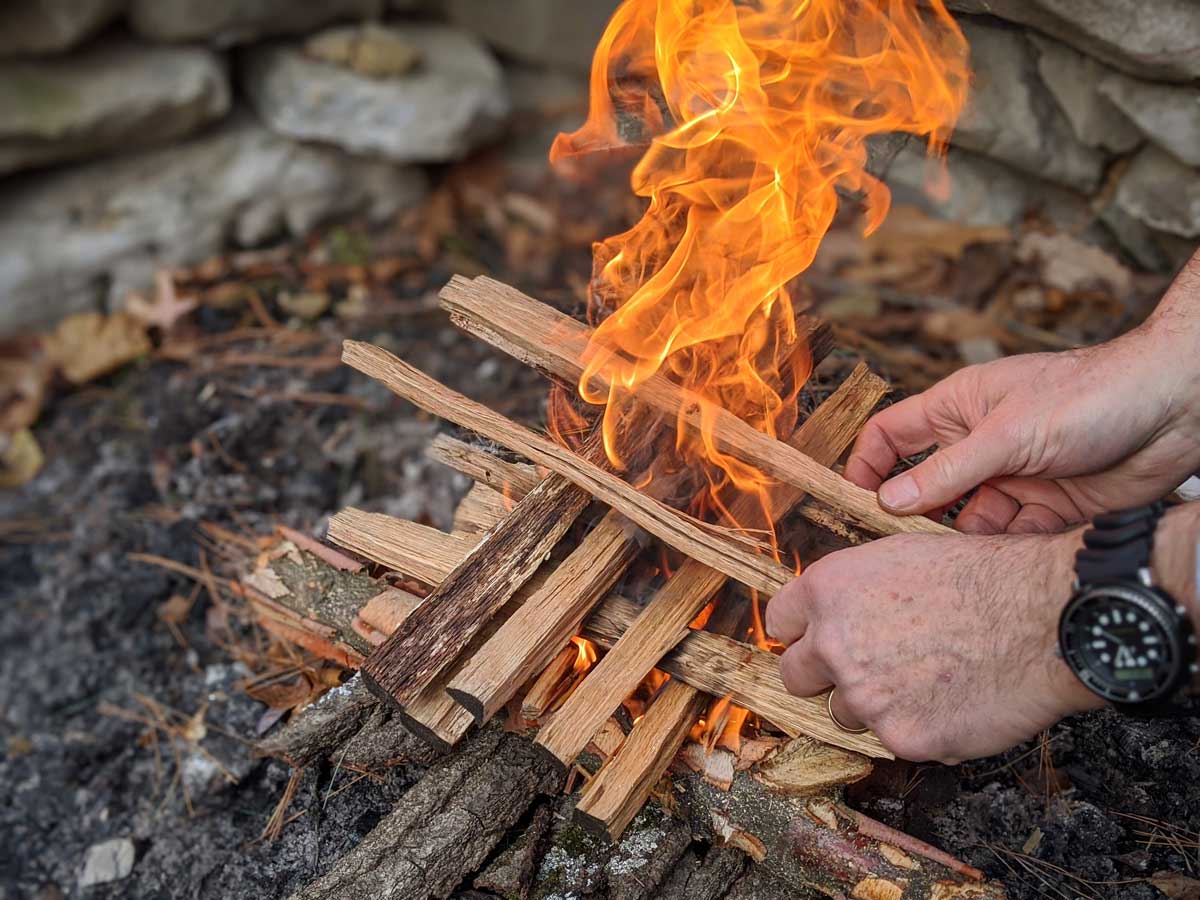
When you’re finished, sit back and enjoy your creation. Remember, firecraft is an art that evolves from learned skills. Before setting up camp during your next moto-adventure, learn to build a fire in a controlled environment. The lesson here is given under ideal conditions, so do research and practice at any opportunity. Try building different fire lays or experiment with different materials. More importantly, be patient and have a good time learning this new skill!
 Bryan Weber is currently deployed with the U.S. Army in support of COVID-19 response missions. He is the Military Liaison and Executive Officer for the U.S. Army Corps of Engineers Emergency Operations Center in New York City. Bryan’s new start-up, Moto-Recon, LLC (Moto-Recon.com), publishes adventure routes that last 2–3 days. E. Scott Lowdermilk is a retired Army Officer and serving in Hawaii supporting the federal government’s response to COVID-19. He is currently planning a new adventure in the Shenandoah Valley and through the Appalachian Mountains.